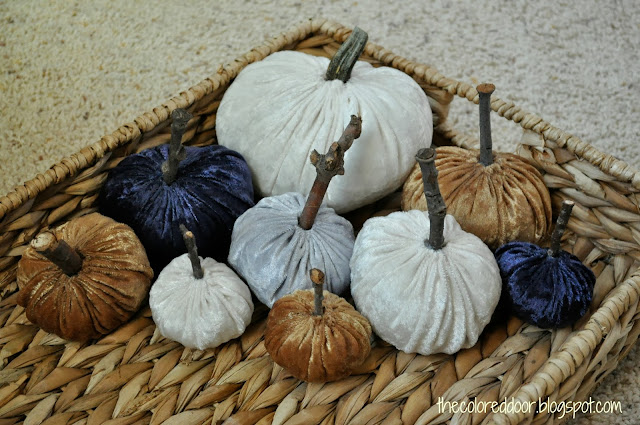
I love the velvet pumpkins I see online, they just aren't in my budget. So I thought I could make my own. I found velvet in more neutral fall colors and went to town. I just loved making these cute little things. They were very easy and fast.
Here's what you will need:
First you will need to go hunt down some sticks or leftover pumpkins stem if you can find them. I really wanted to make sure the pumpkin stems were really dried out before I used them.
Velvet - in whatever colors you like
Beans - or something else to give the pumpkins weight (optional)
Stuffing
Needle and Thread
Hot Glue Gun
I found the biggest bowl I could find, it was about 13" across. I put the velvet face down and used a pencil to mark around the bowl.
I cut the circle out, just remember it does not have to be perfect. It will be gathered together at the top so you won't be able to tell.
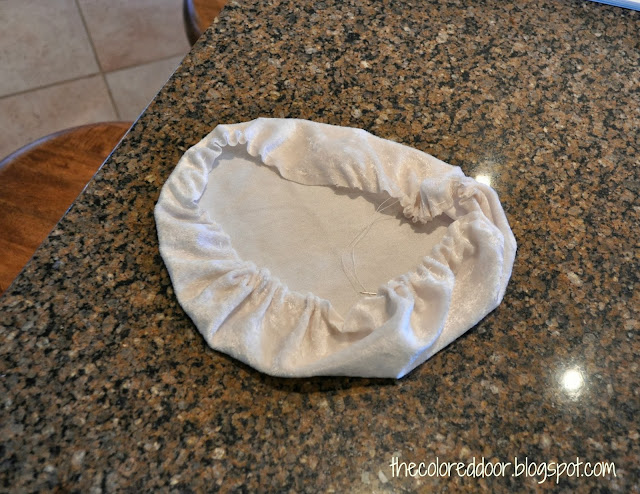
I used white thread to match the velvet and stitched around the perimeter about 1/4" from the edge.
I gently pulled the thread to gather it all around the edge.
1) I put beans in the bottom to give it some weight. 2) I filled it with stuffing. 3) then I pulled the strings tighter to gather the fabric at the top. 4) I saved a pumpkin stem from last year to use as my stem, you could also use a stick, that is what most of mine have. I pulled out the hot glue gun and put glue on the stuffing to help hold the stem in place.
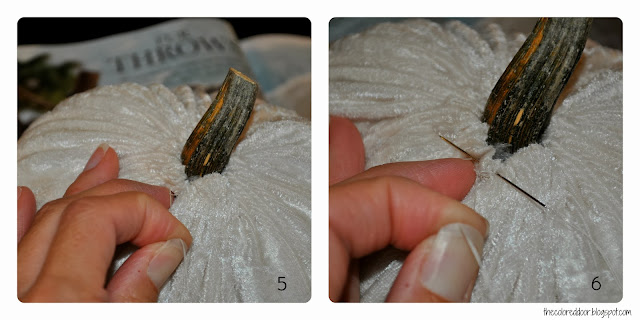
5) I pulled the strings tight around the base of the stem 6) and stitched through the folds multiply times to lock the string in place.
Here it is all stitched together. I just love how it is kind of oval looking just like a lot of the real white pumpkins I see. I might add some more colors this year. I even like the pink pumpkins I have seen around. The girls would love to have pink velvet pumpkins in their rooms.
Happy Fall everyone!

Linked up over at: Balancing Home, Tatertots and Jello, The Lettered Cottage, 30 Handmade Days, Happy Hour Projects, Young and Crafty, The Charm of Home, It's Overflowing, Be Different Act Normal, A Vision to Remember, Or So She Says, Uncommon Designs, Skip to my Lou, Craft O Maniac, Keeping it Simple, I should be mopping the floor, My Uncommon Slice of Suburbia, Handy man crafty woman, DIY by Design, Cherished Bliss, Someday Crafts, Lamberts Lately, 36th Avenue, A Glimpse Inside, Shabby Creek Cottage, Lovely Crafty Home, Thirfty Decor Chick, Yesterday on Tuesday, A Stroll Thru Life, Liz Marie Blog


I love how these turned out - so simple and elegant!!
ReplyDeleteAbsolutely stunning presentation...I love neutral fall decor! This would be great to link-up to Create It Thursday #22…it's live now! Hope to see you there!
ReplyDeleteVery nice! Love the colors you used to create these.
ReplyDeleteThanks for linking up to this week's Catch a Glimpse Party! I'll be featuring this tomorrow! :)
Last year I collected a whole bunch of pumpkin stems because I was planning to teach my friends how to make velvet pumpkins this year. I stuck all of the stems in a plastic sack and tucked them into my Halloween stuff when I put it away. I just opened up the bag yesterday and found all of the stems absolutely COVERED in nasty, fuzzy mold! Oh my gosh! I threw them all away. If I do this again, I think I will set the stems in a low oven for several hours to see if I can dry them out so that doesn't happen again. Gross!
ReplyDeleteGorgeous and thanks so much for the tutorial. http://www.astrollthrulife.net/2013/10/fall-in-breakfast-room.html
ReplyDeleteLove these! They look so easy to do but look like you bought them somewhere expensive, thanks for sharing! Stopping by from Inspire Me Please.
ReplyDeleteWhat a pretty clever idea. I did not know you could do such beautiful velvet pumpkins. Thanks for sharing.
ReplyDeleteEllya